
January 10, 2020
I am so excited to teach you about one of my favorite things: how to press leaves and foliage! This post gives you insight into this integral aspect of pressed flower art.

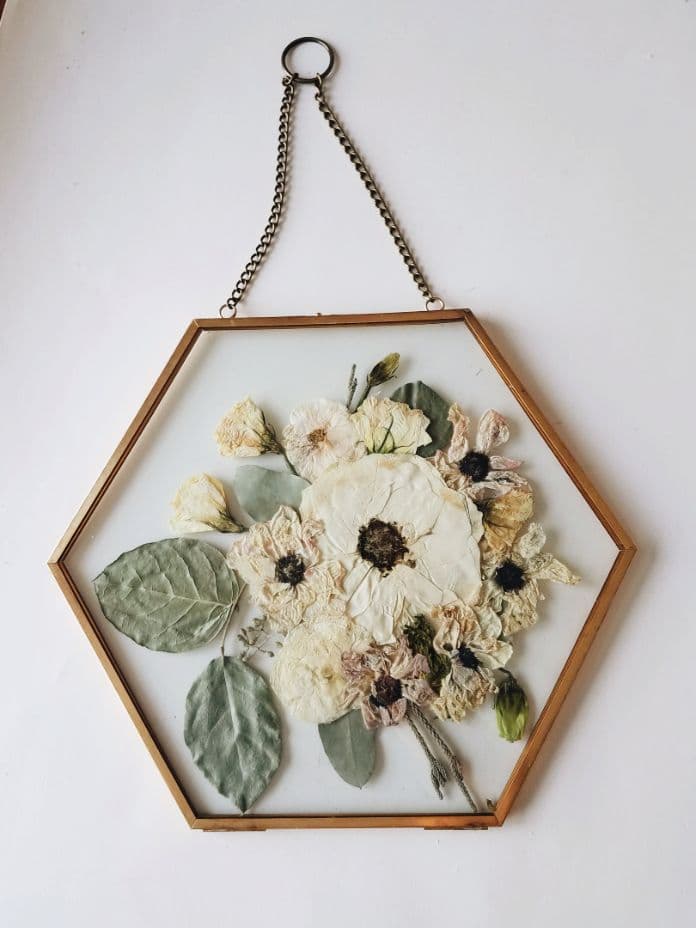
The name of my business is Pressed Flower Shop, but this name does not include the backbone of pressed flower art: pressed leaves and greenery. We all know how beautiful flowers are. They are truly transformed when paired with the backdrop nature provides. You rarely see bouquets with only flowers. The wildest, most dramatic bouquets often feature sprays of leaves and vines.
The good news about pressing most greenery is that it is fairly easy. That is why it is one of my favorite things to press! While bouquet flowers tend to have big, juicy stems and tons of moisture, leaves do not contain this level of water. This makes them much easier to press. Another good thing about foliage is that it tends to be hardy. When I get bouquets shipped to me, the greenery will almost always look perfect, even if the flowers have begun to wilt.
Why You Should Press Leaves
We all know that flowers tend to be the star of the show. They come in a multitude of colors and varieties, and they tend to be the main focus of bouquets. However, they are not the only element to consider.
You should make an effort to save a sample of each plant in bouquets. This gives the best representation of the original flowers. In addition, many pieces of art that are not bridal bouquets rely on greenery for a backdrop and an accent that will always match. Flowers without stems and leaves would seem bare. The same concept applies to pressed flower art.
Ultimately, the individual flower presser will decide what looks best in a piece. Several years ago I rarely used leaves in my art. Now I cannot imagine my work without them. When in doubt, you can always press the leaves and decide whether or not to use them later.
How to Press Foliage
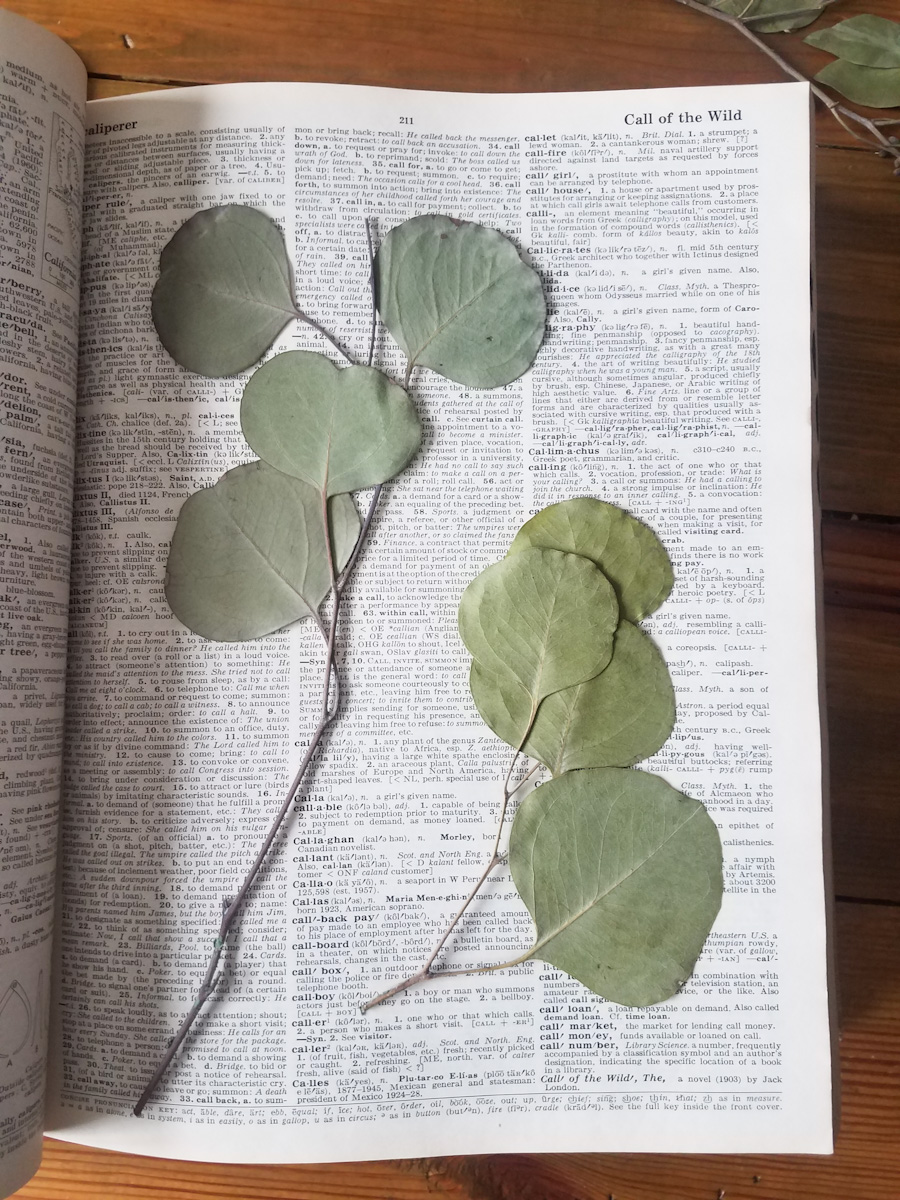
So – how to press leaves? Thankfully, it is quite simple. The steps are as follows:
- Dry the stems off and cut the branches into reasonable sized pieces.
- Adjust the size of the pieces to fit the book pages or press you are working with.
- Place the leaves in the book or flower press on printer paper or directly on the pages of the book.
- Most leaves are thick enough that they will not stick or pick up the color of the text.
- When you are ready to close the press or book, make sure the leaves are not curled or in too many layers. This helps prevent discoloration and breakage.
- Wait 3-8 weeks depending on the thickness of the foliage for everything to be completely dry. Once they are dry to the touch, you can take the leaves out of the press and use them in your projects.

If you read my other post about pressing flowers, you know that removing the stems can help prevent mold from growing. You do not need to remove the stems of branching leaves or small flowers (baby’s breath or eucalyptus, for example). That would be quite tedious!
Similarly, other foliage requires less attention. Astilbe, fern, wild grasses, and wildflowers are all examples of filler plants that can be pressed in this way.
Check out my Instagram for the latest art featuring both flowers and leaves!


Comments